Bathroom Makeover – Final Touches

Last week I tied up a few loose ends in the bathroom!  Again, Pinterest had given me a few ideas that I wanted to get done.  Mainly because the bathroom needed a few more pops of colour, but I also wanted to have a go at some other crafts!

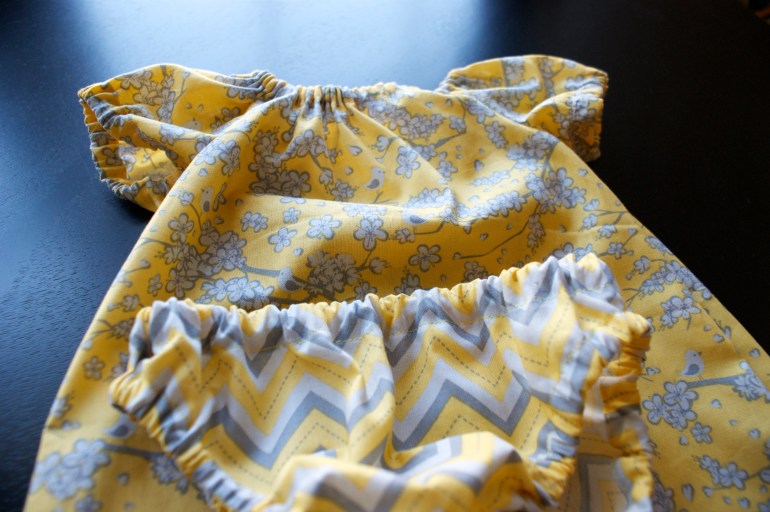
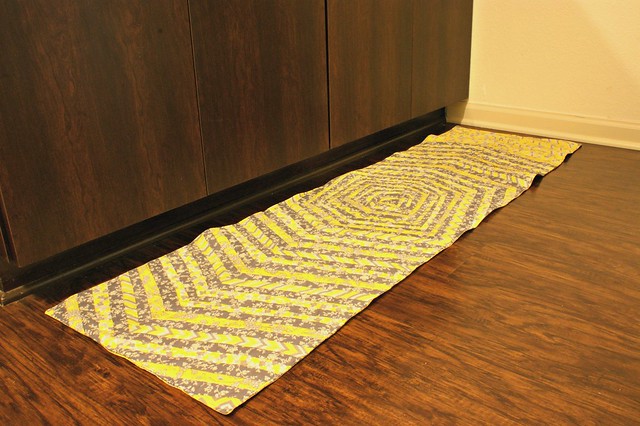
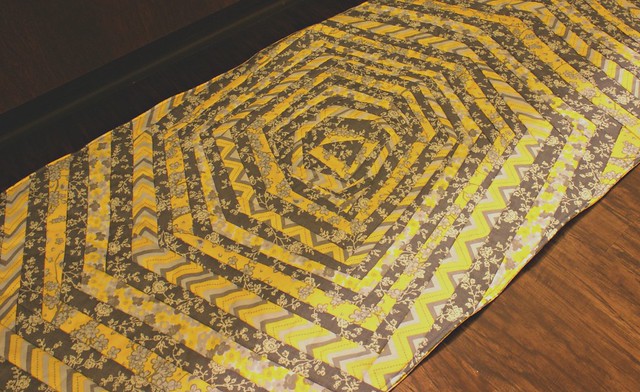
1.  You may have seen this runner on my Sunday Sevens post and I finally got it finished!  Man, did it take some time!  I used a method called ‘Quilt as you go‘, where you sew the fabric straight onto the batting.  The tutorial I looked at was for a cushion cover panel, which I may make at a later date!  I really like the effect, and as I worked toward the edge of my batting, the fabric created a chevron effect.

Full runner

close up centre runner


Blooming Babies

I like sewing things for babies and children.  Toys and teddies are sweet.  Clothes and accessories are nice to work with as there isn’t loads of material trailing on the floor.  That is about as far as I will stretch at moment with anything to do with babies; I know quite a few people who have had babies recently or are pregnant at the moment…that’s fine with me!  I will stick to the sewing for now 😀

We had a couple of friends in mind who we would have liked to send a baby gift.  I wanted to make something different so referred to Pinterest for part of my project.  I found a link to Megan at The Quilt Story where a cute little outfit is made using two separate tutorials; one for the dress and one for the nappy cover.  When explaining this project to my Mum, I used the American word ‘diaper’ …she laughed and said I was becoming all American already!

They were nice to sew as nothing seemed too much trouble.  I did a double fold on the hems and inserted elastic where necessary.  The trickiest part was folding and sewing the hems on the legs of the nappy cover due to them being curved.  There are a couple of folds where the excess fabric gathered but once they bunch up with the elastic, they are hardly noticeable 🙂

DSC04183

Ooooh an estate sale!

It was last Sunday.  It was miserable outside and we were fed up of being inside.  We set off out to find some antique stores to look around. I had seen a place online called Olde Mobile Antiques Gallery and it turned out that it was just around the corner from us!  We got there and it was shut.  I was sad but I should have known as it was a Sunday 😦  When we returned home, I found Olde Mobile on Facebook and got terribly excited when I found out they were holding their monthly estate sale on Friday!  I have never been to an estate sale, and we had just picked up the truck which meant I could go on the opening day.  This made me very happy and I even got out of bed before 8am!

I headed down to the sale around 10:30am.  By this time, it had already been open for a couple of hours and the car park was packed!  As I walked through the car park, there were many people coming out with bags and boxes full of goodies.  I really didn’t know where to start when I got in.  I certainly didn’t think it was going to be as big as it was and it was a little overwhelming for a first time estate sale attendee like myself.

Estate sale inside

Bathroom Makeover Part 3 – Handmade Bathmat

I recently borrowed a book from the library called ‘Simple Sewing with Lola Nova’ which has loads of useful projects that are quite different to the ones that get recycled over and over.  The blog is also worth a read!  It was one of these projects that got me thinking about giving the bathroom a little makeover.  The bathmat project was simple but I did change a few things to suit what I needed.  I bought a plain grey hand towel from Walmart that would be used as the back of the mat.  My plan needed to reflect the measurements of the towel so my patchwork squares were different to those in the book.

Plan

Bathroom Makeover Part 2 – Shelving Curtains

We do have a good amount of storage in the bathroom; shelves in the bath/shower area, cupboards under the sinks and shelving for towels etc. As I like everything to be hidden, I didn’t love having our towels and bathroom bin being on show so the second part of our little bathroom makeover involves the creation of shelving ‘curtains‘. ‘Curtains‘ being italicised as they aren’t really curtains, they don’t open but they do the same job as a curtain!

Sad shelves

Bathroom Makeover Part 1

A couple of weeks ago I was very daring and I bought a single crochet hook and a ball of yarn.  Hours of online research later (mainly Pinterest!), I have taught myself to crochet and have made items that I am already super pleased with!  The first was the hat that appeared in my #sundaysevens blog post.

The next thing I had my eye on was some crochet bunting.  The tutorial/pattern was very basic and I was a little dubious that it wouldn’t be very good.  However, it was easy to follow and produced some lovely little triangles that could be turned into bunting.

Our apartment is rented and furnished through the housing company that is linked with the company that Adam works for.  It is lovely, modern and simple; just the right size for us but the colour schemes are not ‘us’.  We like little pops of colour!  Yes, there are different colours around the apartment but they are mainly on the cream and brown spectrum.  This makes me a little sad.  So a few little projects popped into my head and here I am giving our apartment a little makeover!

Starting with the bathroom!