
Last week I tied up a few loose ends in the bathroom! Again, Pinterest had given me a few ideas that I wanted to get done. Mainly because the bathroom needed a few more pops of colour, but I also wanted to have a go at some other crafts!
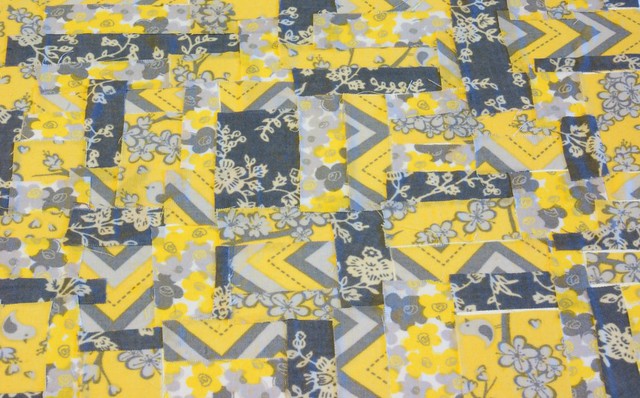
1. You may have seen this runner on my Sunday Sevens post and I finally got it finished! Man, did it take some time! I used a method called ‘Quilt as you go‘, where you sew the fabric straight onto the batting. The tutorial I looked at was for a cushion cover panel, which I may make at a later date! I really like the effect, and as I worked toward the edge of my batting, the fabric created a chevron effect.
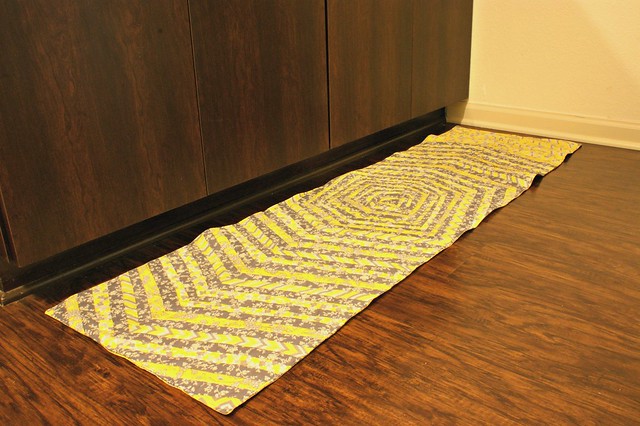
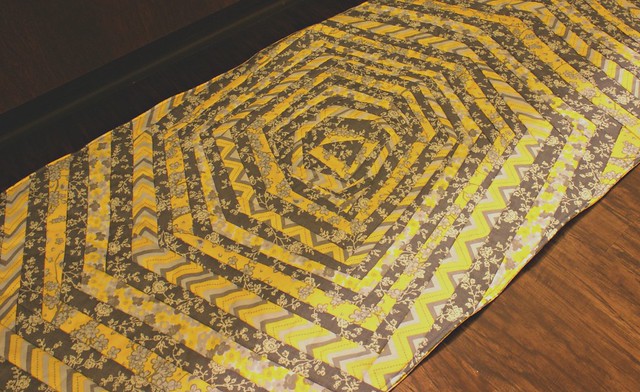
The yellow fabric is back out…I was determined to use every last inch of it! I ran out of grey as I got to one side but I didn’t really want to buy any more fabric.
I used up the final large pieces of yellow fabric for the back. I stitched it with the right sides together, flipped it and top stitched around the edge 🙂


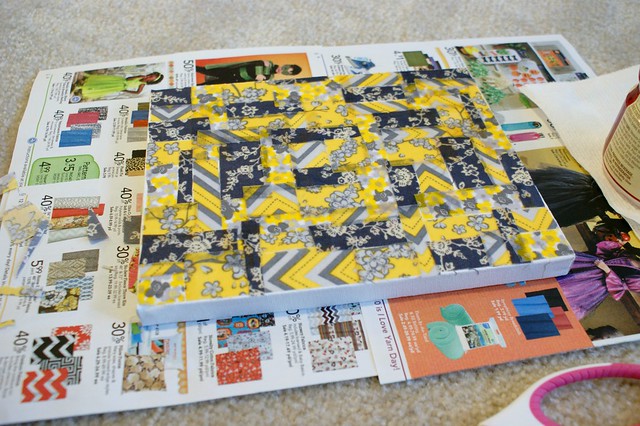
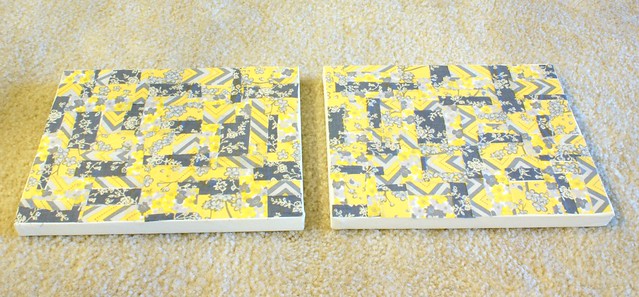
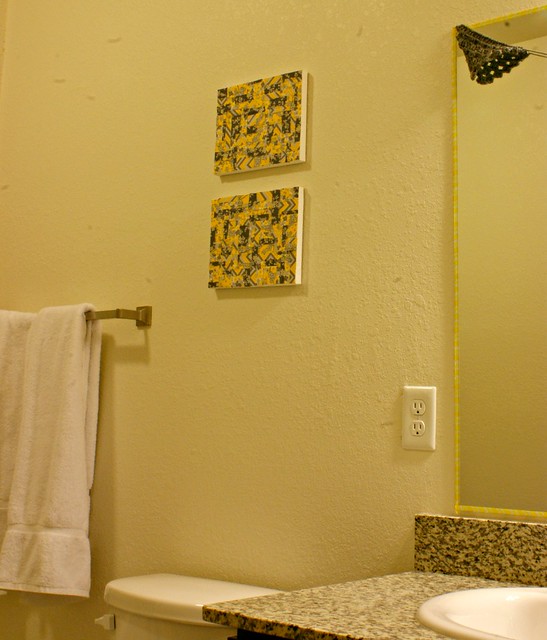
2. What a perfect way to make use of tiny scraps! Cue the very last bits of the yellow & grey fabric….I promise! I chose to cover 2 canvases that I managed to grab while they were half price. I used watered down school glue to attach the fabric and gave it another coat once the first layer had dried.
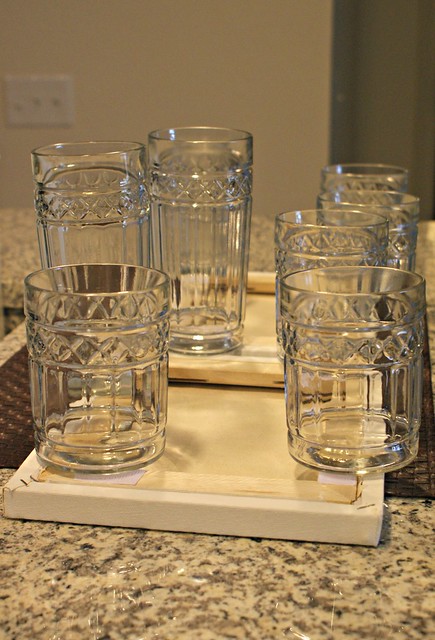
I LOVE how these turned out! My very first bit of art….if you can stretch to calling them that! The sticky velco pads were useful again to attach them to the wall. However, I needed to use glue to fix the opposite piece of velcro to the wood on the reverse side of the canvas. I needed to use all of our heavy glasses to keep the velcro in place whilst it was drying….inventive?? Next time, I think I would choose to use larger canvases as they look a little bit small now that they are on the wall ![]()
3. I had picked up a plain wooden frame from an estate sale for $1. It had a cheesy quote as the picture so I didn’t mind taking it to bits to use the frame. I wanted to create my own version of this. I originally wanted to try some chalk paint but it seemed a little pricey for the small amount that I actually needed. I ended up settling for some yellow all surface paint from Walmart. I bought myself a little palette too that made me very happy!
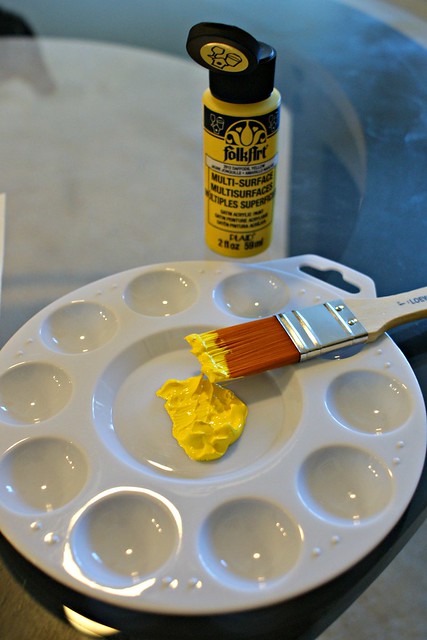

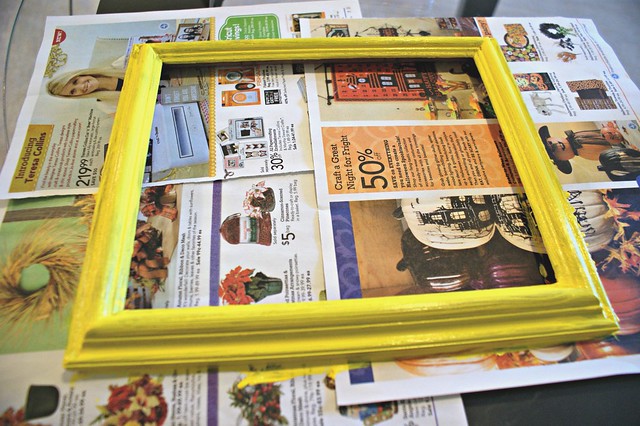
I haven’t got the finished version of this up yet as it still needs a couple of extra coats. It will be attached to the wall with the trusty sticky velcro circles again 🙂
I have still got a couple of other little bits that I would like to add to the bathroom but they won’t really warrant a blog post. I want to do something with washi tape on our soap dish and toothbrush holder, and maybe even an edging on the cupboards but I’m not convinced about that one yet! I might share a couple of pictures if you’re lucky 😉


Everything looks great!
I love the art you made for the wall! Hopping over from Oak & Oats. Thanks for a great post!
Thanks Mandy!
Popping over from the Merry Monday Link Up. Bless you can that quilted piece! Gorgeous! I have a board on Pinterest called Sew Much To Do. It’s mostly sewing stuff that I’ll never do =)
that is really cute and clever
Very inventive and good to see you’re using every last scrap of fabric:)
That runner is gorgeous and I love the yellow and grey pops of color!
Thanks Meredith 🙂
Hi there. Stopping by via the Southern Girls FB page.
It all looks so great. Love the colors.
We are just getting ready to totally remodel our bath.. ugh.. I’m hoping it will be fun.. lol.
Thank you for stopping by! I hope you blog about your decorating 🙂
This is amazing! Love the details & the colors! Thanks for sharing & linking up at #SoMe2 this week!
Thanks Kim 🙂
I just love that wall art! So creative 🙂 A little bit goes a long way to brighten up a small space. Love!
~Meaghan
Although I haven’t commented much along the way, I have loved reading about and watching your accessorised bathroom come together. My only problem is, that is far too beautiful a creation to be used as a bath may! A throw or a quilt, definitely, but it looks far too intricate and effective to just dry off damp toes. I may well be asking for tips, should I ever embark on a quilting project.
Thanks 🙂
The quilt as you go method would be a perfect one to start with too as it is quite straight forward – it would be a good one to use coordinating fat quarters up I think. I might make some Christmas cushion covers with the same style 🙂
Do you mean using a chevron design again, or just the same technique?
The same technique probably…maybe even the same design as the centre of the mat??
I also need to make a start on christmas projects, i have the fabric in ready 🙂 I’m thinking of attempting the tree from the pattern you found.
That runner is awesome!!