Quilted Jacket – Pauline Alice Ayora

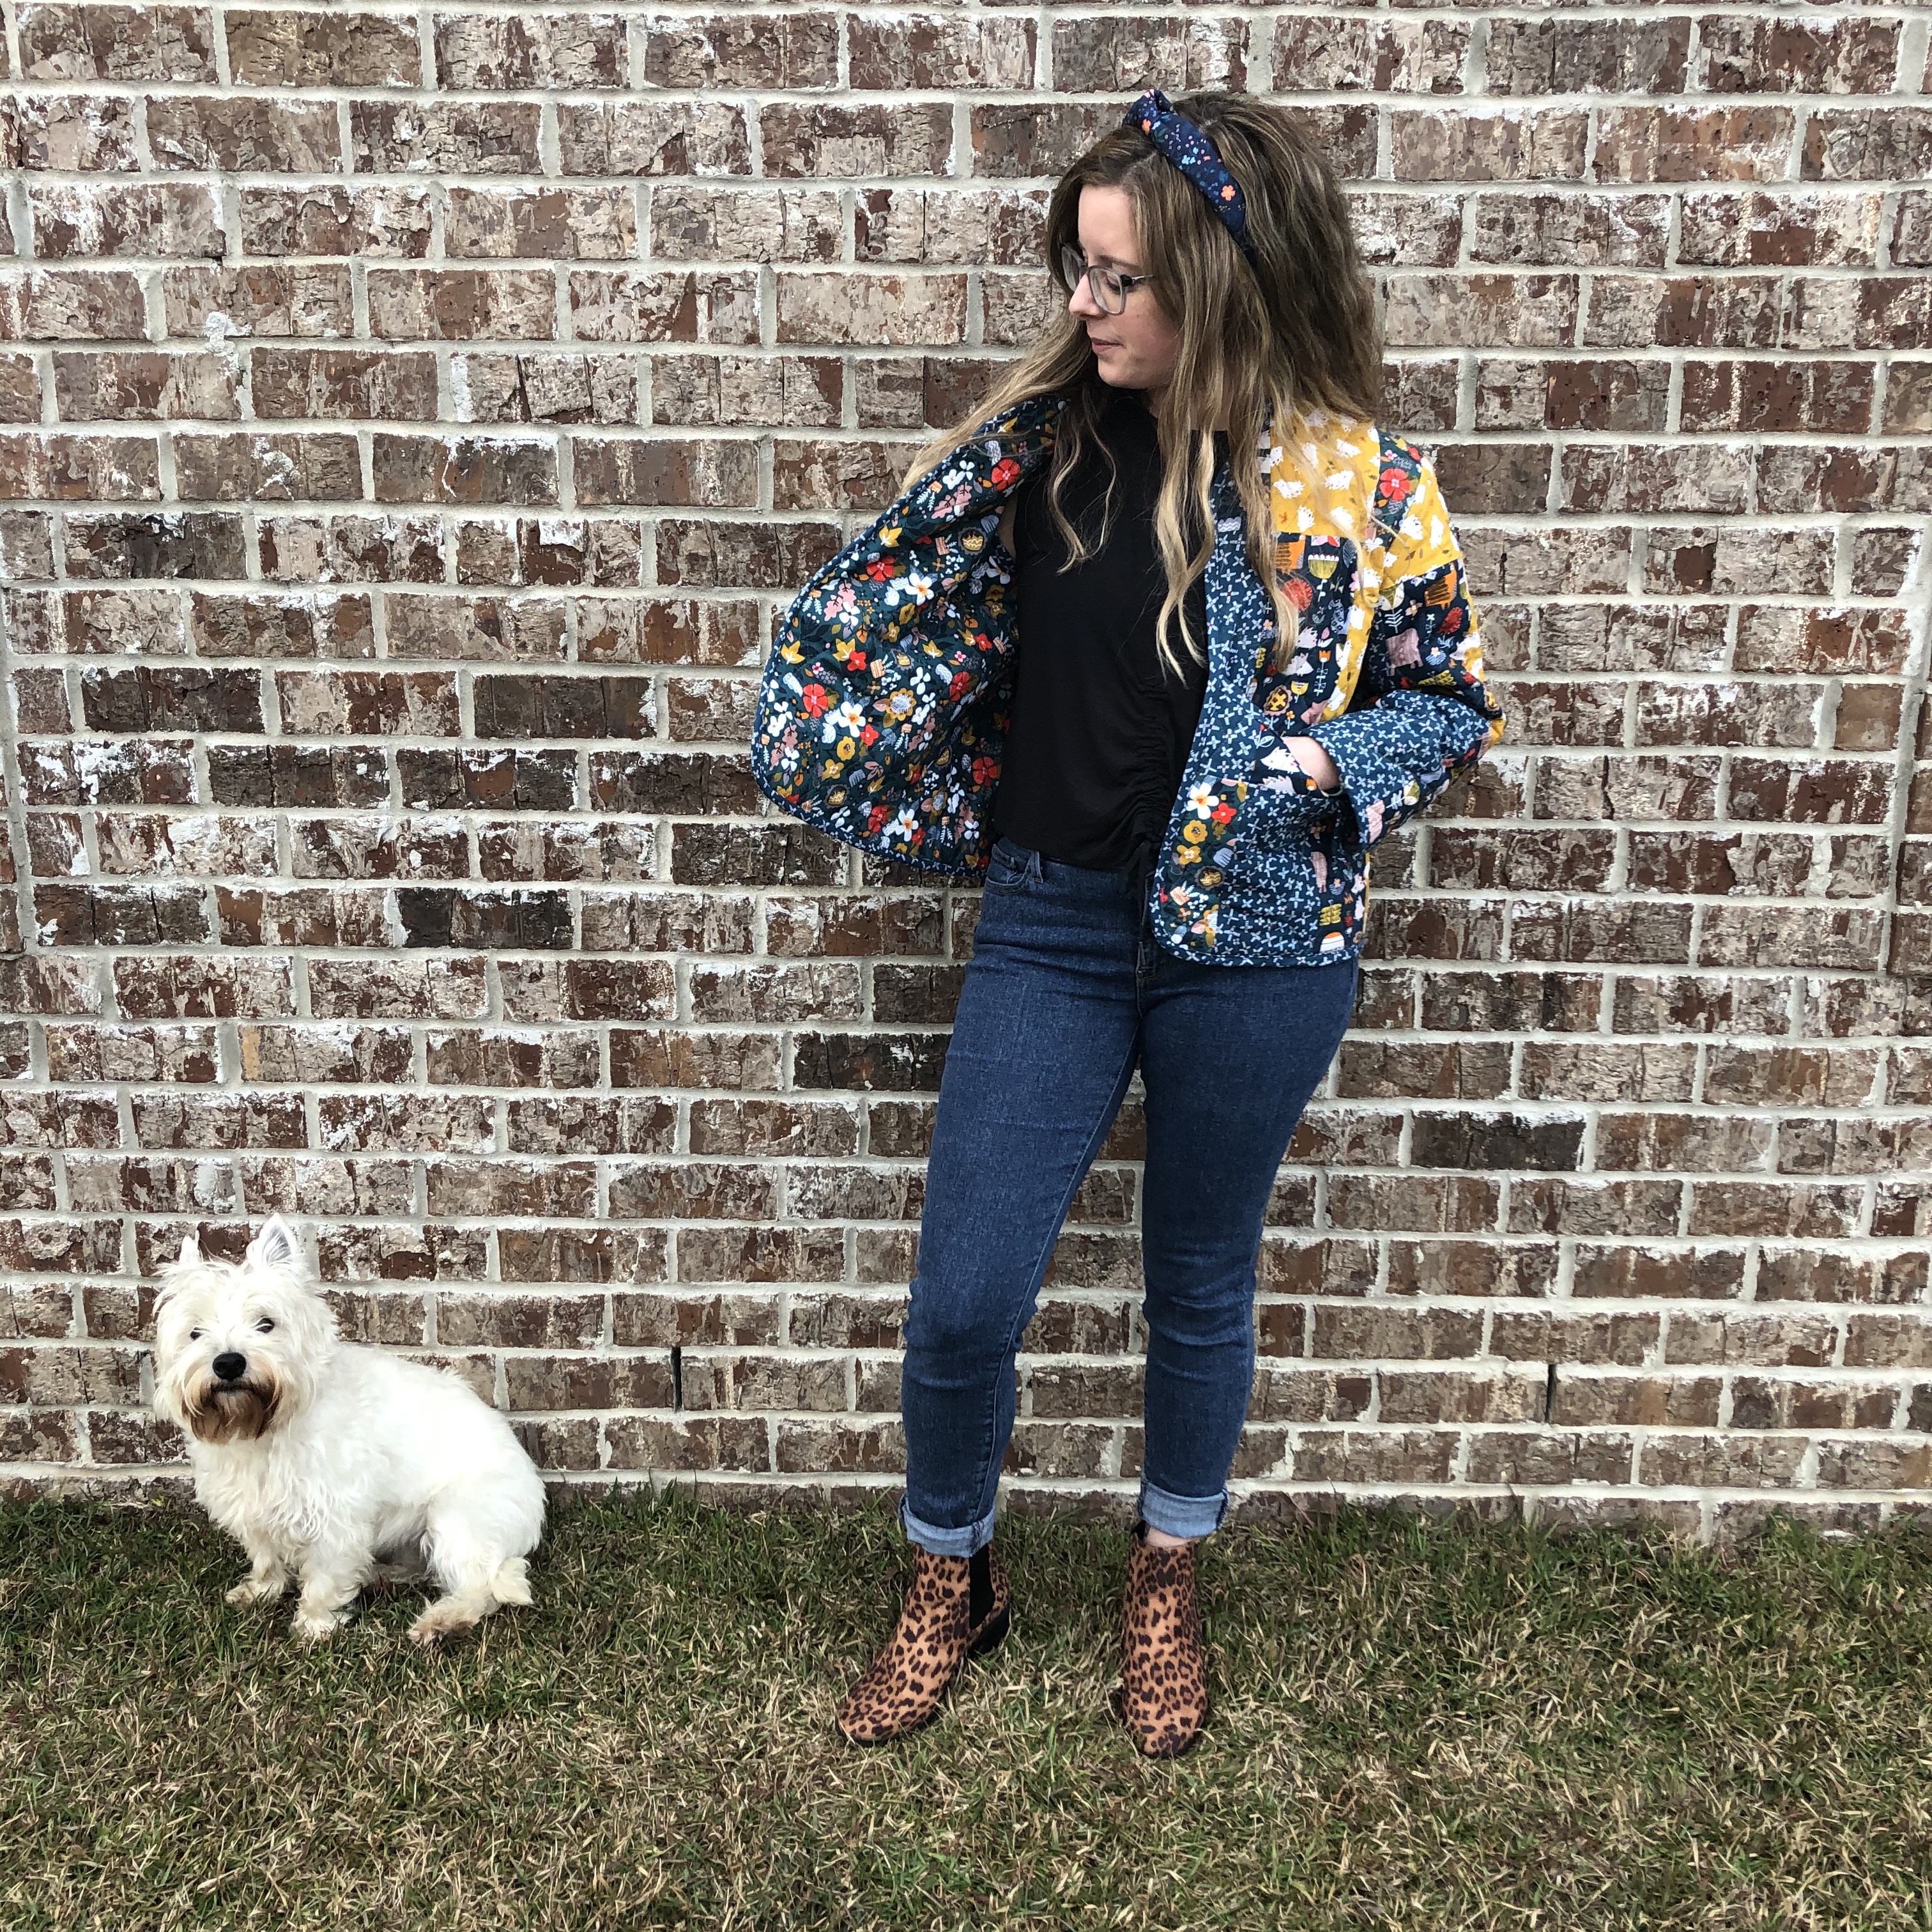
It’s about time that I put my quilted jacket in a blog! I actually got this finished just over a month ago…as with all the things you will be seeing on here soon…I told you I was catching up with posts right?!

A quilted jacket had been on my list for a while but I just hadn’t gotten around to putting the whole process into motion. Just after Christmas, I had signed up for the Topstitch Makers Community and one of their sew-alongs was for a quilted jacket!! I found this to be the perfect opportunity for me to get started on mine. The sew-along was run by Natalie Ebaugh over a series of sessions on a Sunday evening. She gave a couple of recommendations for patterns to use and I chose the Ayora Jacket by Pauline Alice Patterns.

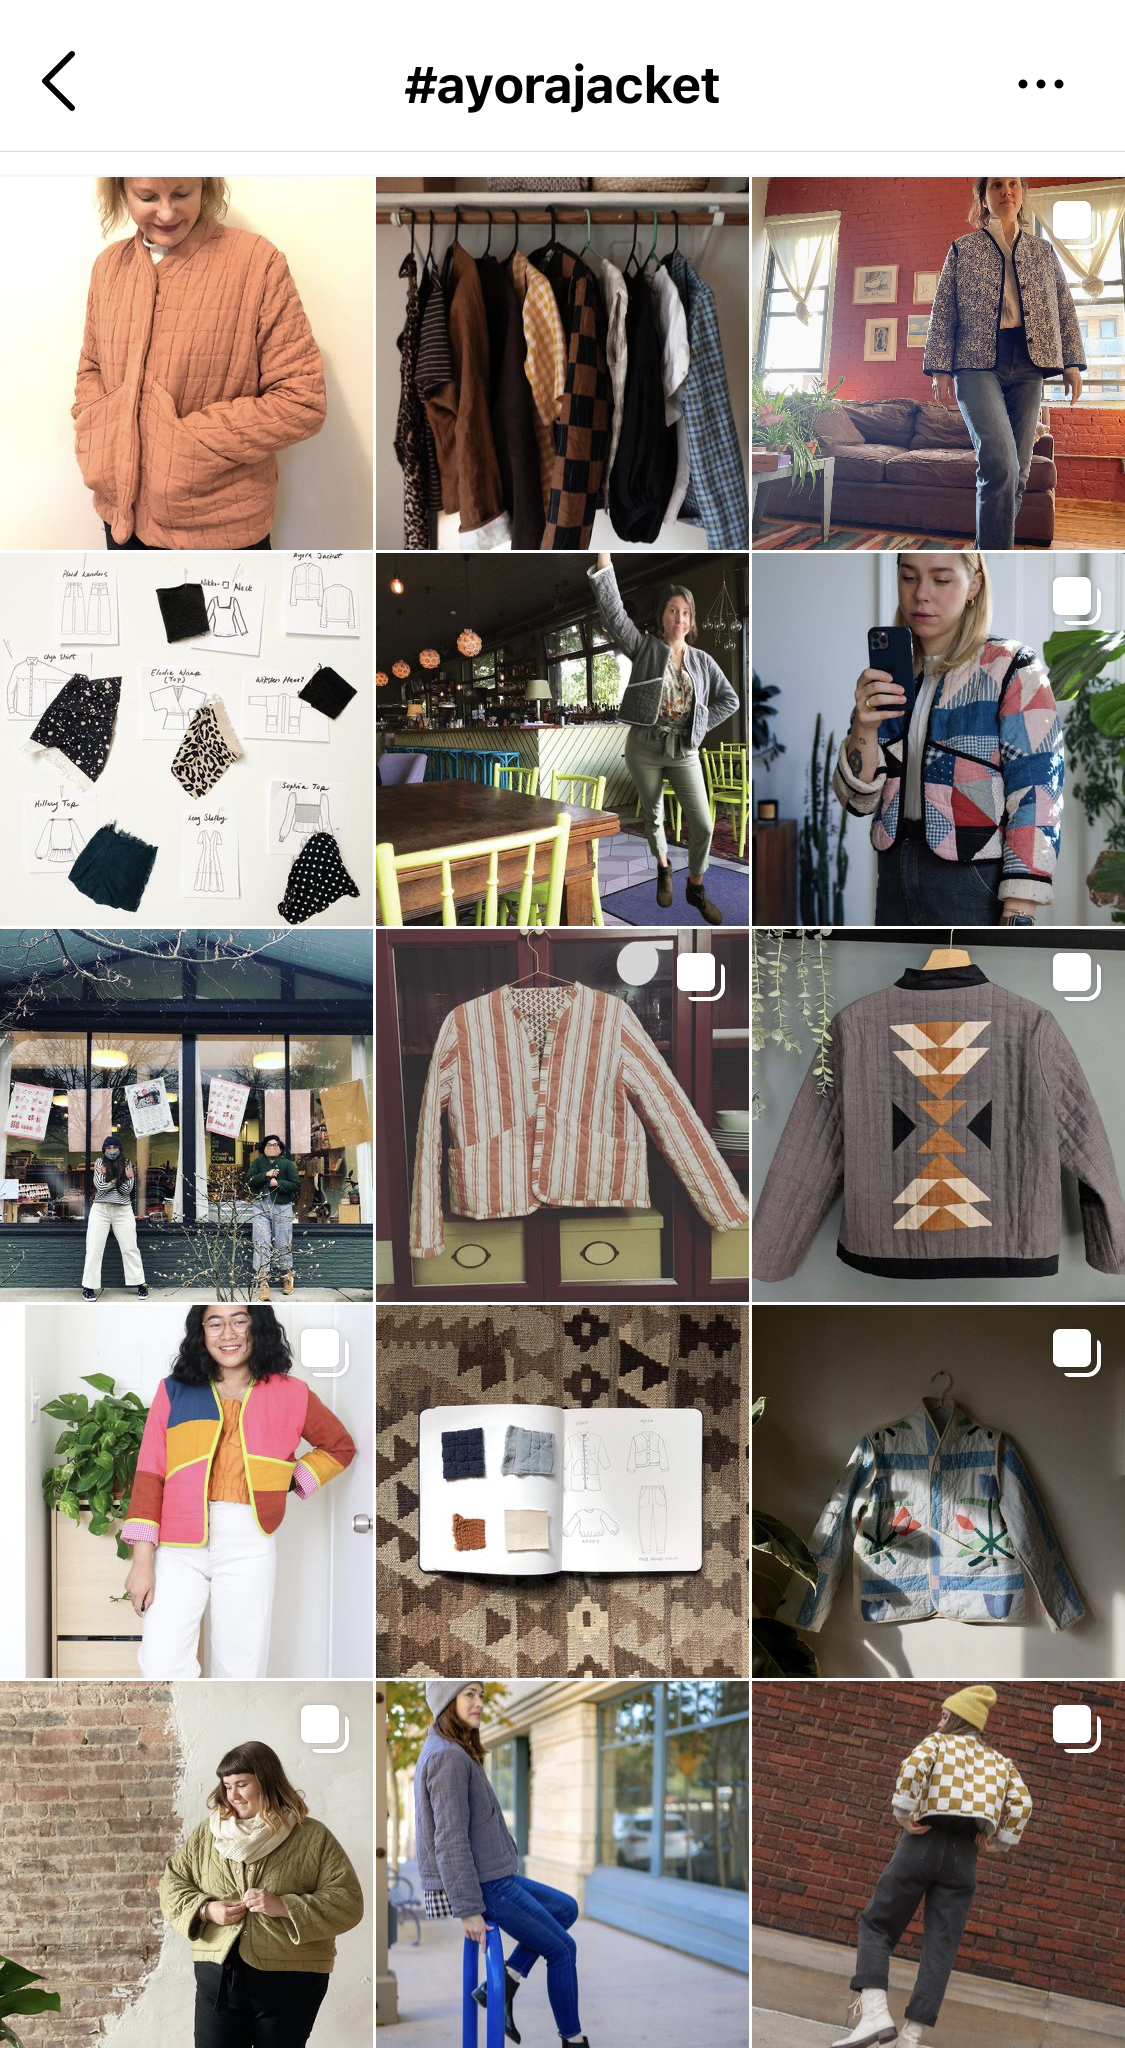
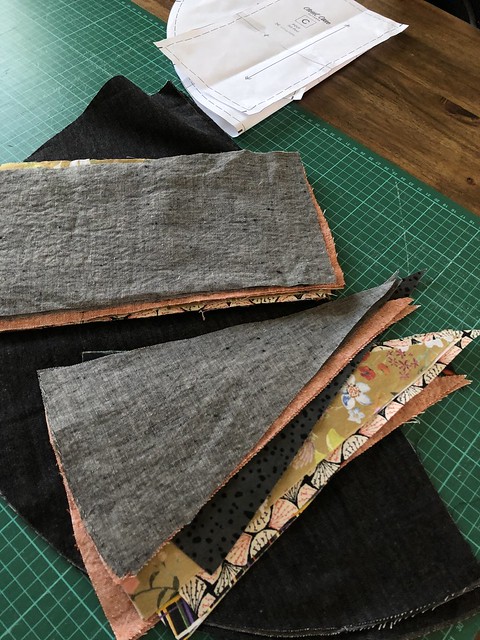
I had just got a few of the fabrics from the Dashwood Studio Hibernate Collection in so I knew that I wanted to use those in some way. One of my favorite things about starting a project at the moment is browsing through that relevant hashtag over on Instagram. The tag for the Ayora jacket is just fabulous! It gave me a lot of ideas about design. I knew that I wanted to experiment with a couple of design ideas and I had read mixed things about the sizing so I did decide to do a toile. Now I did sell out of most of the Hibernate Collection of fabric but I do have a little of the blue clover left. I used this one for some of the panels and my binding.

I started out with my size according to the measurement chart (40) and it ended up being way too tight, particularly over the shoulders. I then tried the size 44 and it felt much better. I was aware that the finished garment would be a touch tighter than the toile because of the thickness of the quilted fabric being used, so even though the 44 toile was a touch too big, I went with it anyway to ensure an oversized + boxy fit. The length was also questionable for me but I decided to stick with the original length for this one.

Each week during the sew-along we tackled a different part of the sewing processed, and even though everyone was at different stages in their own quilted jacket journey, it was nice to have the guidance and to be sewing at the same time as others.

I did decide to make the two sides of my jacket slightly different from each other. For one side, I pieced together rectangular pieces of fabric to create a longer patchwork look.

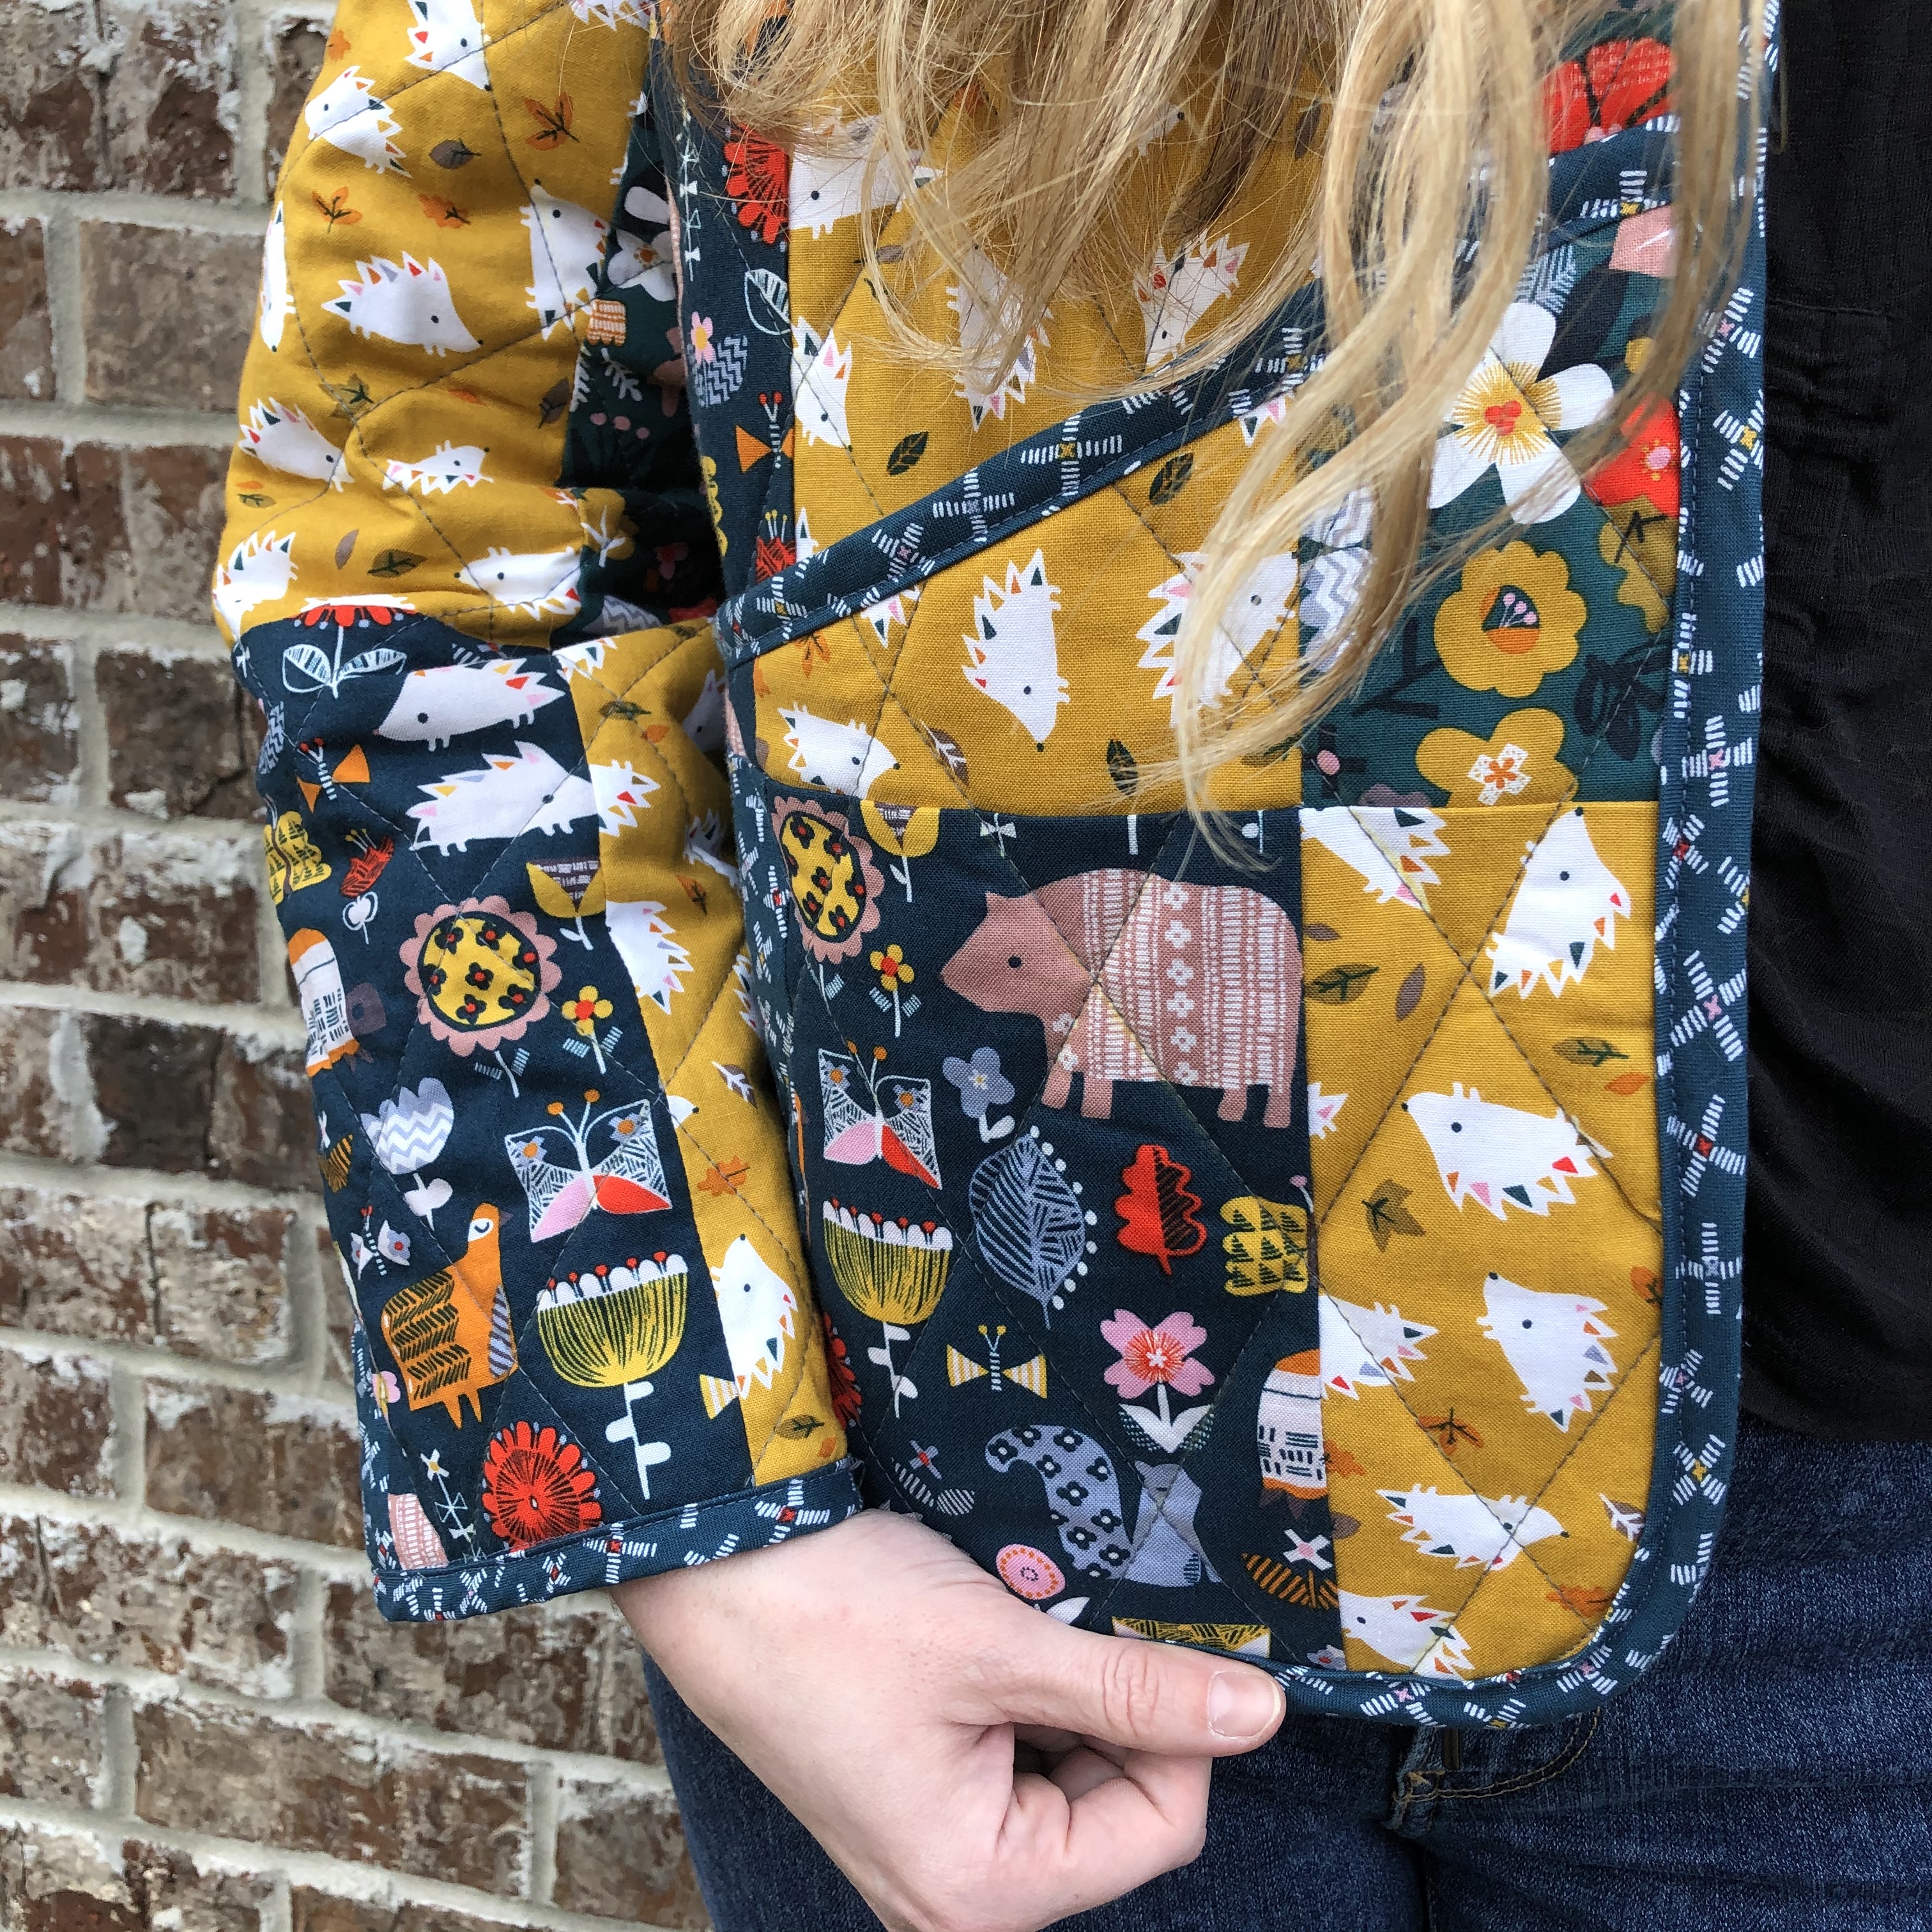
For the other side, I had originally planned for it to be all floral, but because the bodice jacket piece is one full pattern piece, I struggled to get it to fit onto the 44″ wide fabric. I ended up placing a panel down the center back of the jacket to make it work. I then made the pocket on this side of the jacket match the panel.

The individual pattern pieces were quilted separately before they were stitched together to form the jacket. I did a diagonal quilting pattern and lengthened my stitch length slightly so that it was a touch more visible.

The armscye and the shoulder seams were bound with self- made bias binding. This bias binding went all the way around the edge of the jacket too. This did mean that I excluded the facing piece from the original pattern. Again, this idea came from the hashtag on Instagram.

I absolutely love this jacket and I’ve already worn it so much. I am planning another one for sure but I just can’t decide on the design. I would like a longer one, maybe mid-thigh length, but I would also like a sleeveless one! I would also like one made up with lighter colors….sooooo many options and ideas!!

Just let me know if you have any questions about it!

Matching Outfits + Machine Appliqué

Last week, I blogged about some shorts that I had made up for a class, and of course for Rosie to wear afterwards. Now here in South Alabama, monogramming, embroidery and matching outfits are everything, and us being from the UK, tend to throw on whatever slightly matches and we’ll call it an outfit. Well, these shorts were just calling out to be made into matching sets and I really wanted to try some basic machine appliqué as I hadn’t done it for such a long time!

I bought some blank t-shirts for Rosie from a local boutique. These were a purchase where I thought that I could have probably made them but I just didn’t have the time to find the perfect t-shirt fabric, and wanted these to be completed in an afternoon. I want to show you how I created my appliqué designs on my regular sewing machine.

I started off by gathering my supplies. I printed my appliqué template shapes onto normal paper and pinned them to my transfer paper. The one I used was Pellon 805 Wonder-Under. I cut my shape out of the transfer paper.

I then placed my transfer paper onto my fabric. I made sure that the paper side was facing me and the adhesive side was on the fabric.

Using a low iron, I pressed over the transfer paper. This allows the adhesive to stick to the fabric and the paper stays on the template.

I then cut around my template so that I had my appliqué shape.

The paper part of the transfer paper then peels off, revealing some more adhesive. This is the adhesive that sticks the appliqué shape to the shirt.

I positioned my appliqué shape on the shirt and then used the iron on a low heat to stick it down to the shirt.

I also iron a little bit of stretch interfacing onto the inside of the t-shirt. This will sit behind the appliqué shape and add a tiny bit of extra reinforcement.

I changed my machine stitch to a basic zig zag and carefully stitched around the edge of my shape.

And there you go! The appliqué is nice and secure and matches perfectly with the shorts. I really think that this is a great little method to add something extra to those plain t-shirts. I know that I’ll be making many more of these.

Rosie’s Bubbla Shorts

I’ve got a short and sweet blog for you today! I was just looking through my photos for ones to upload and I realized that I didn’t actually take many at all to show the construction of these shorts! I actually chose this Bubbla shorts pattern from The Eli Monster for one of my local sewing classes, but I wanted to make up samples to show during the class. This meant Rosie got some new shorts!

The Eli Monster Bubbla shorts

Closet Core Patterns Pouf

For the longest time, the Closet Core Patterns Pouf has been on my list to make. I’ve seen many people sew one up but I’ve been waiting for the right time to make mine. A few factors made me pull the trigger on beginning construction. I knew that I wanted to stuff my pouf with scraps, so for almost 2 years, I’ve been bagging my scraps up and it finally reached a point where I had 3 large bags taking up space in a closet. I also knew that I wanted my pouf to be somewhat coordinated, so I had to wait for a time when I had enough coordinating fabric pieces that were big enough to cut out the pattern pieces.

The pouf itself is actually a free pattern. You have to sign up to the newsletter to get the access password but that’s not a big deal. I’m consciously trying to be aware of the emails I subscribe to, and anything sewing related is approved!

Closet Core Patterns Pouf

Welcome Back!

Let’s be honest…it’s been a while since I put anything on this blog; over a year in fact! So first of all, welcome back!  I’m planning on getting my blog back up and running as I’m still very much sewing every day and making lots of things that I can share with you.  I share a lot over on my Instagram but there are few garments that I would like to go into more detail about over here.

Untitled

I’m planning on sharing some of my recent makes.  Some are sponsored, some are work related, some I’ve had the fabric given to me and some are just my own me mades.  I’ll be fully transparent within each blog, just so you know which is which!

Over the last year, I’ve really worked on building up more of my paid sewing work.  I’m working in the local community offering group classes and individual sewing classes.  My group classes have just got back going again, but with how the World is at the moment, my private lessons are becoming more popular.

Untitled


I’m also on the writing team for Sewing Life Magazine [Aff Link].  It’s an online magazine which is released bimonthly.  You get a sewing pattern and a magazine that is full of useful articles.  I write a few articles and sew up samples for each edition.

Screen Shot 2020-07-26 at 7.45.34 PM

Home-wise we are doing ok! As well as anyone can be doing through a pandemic anyway.  Rosie is 2 and a half and is quite the toddler.  She makes us laugh every day and now loves it when she gets to wear the clothes that Mama made for her!

Untitled


Well, it does feel lovely to write another blog.  Something I haven’t really sat down to do for a long time.  Please say hello again! Speak soon xx