Blooming Babies

I like sewing things for babies and children.  Toys and teddies are sweet.  Clothes and accessories are nice to work with as there isn’t loads of material trailing on the floor.  That is about as far as I will stretch at moment with anything to do with babies; I know quite a few people who have had babies recently or are pregnant at the moment…that’s fine with me!  I will stick to the sewing for now 😀

We had a couple of friends in mind who we would have liked to send a baby gift.  I wanted to make something different so referred to Pinterest for part of my project.  I found a link to Megan at The Quilt Story where a cute little outfit is made using two separate tutorials; one for the dress and one for the nappy cover.  When explaining this project to my Mum, I used the American word ‘diaper’ …she laughed and said I was becoming all American already!

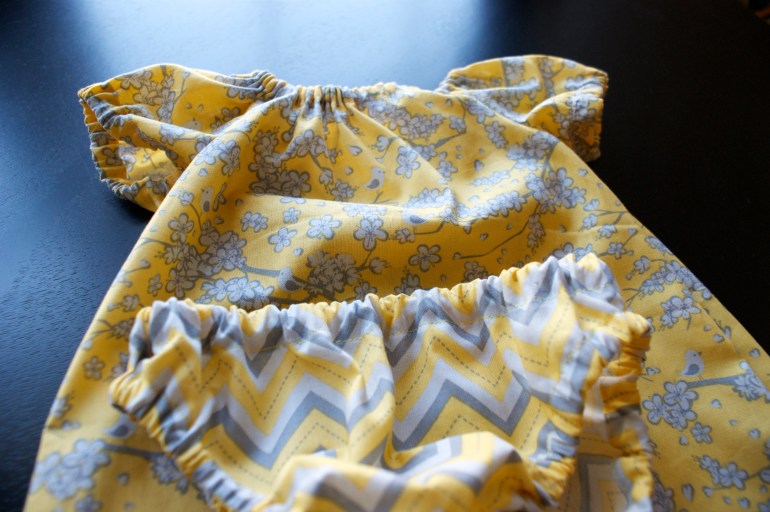
They were nice to sew as nothing seemed too much trouble.  I did a double fold on the hems and inserted elastic where necessary.  The trickiest part was folding and sewing the hems on the legs of the nappy cover due to them being curved.  There are a couple of folds where the excess fabric gathered but once they bunch up with the elastic, they are hardly noticeable 🙂

DSC04183

The Tale of the Short Sleeved Shirt

When fabric shopping last week, Adam found some burgundy cotton, scattered with small golden stars.  He asked if I would make him a shirt and of course, I agreed as long as he could find me a pattern.  So he did.  He chose a New Look pattern that had an option for a shirt for both of us.  I must admit that I was a little scared of the thought of making something that wasn’t clothing for me.  I couldn’t try  it on half way through and I knew that it had to be as close to perfect as possible as I know how fussy Adam can be with his clothes.

This was the first pattern where I had traced elements rather than cutting it all out to the size needed.  I used freezer paper to trace and it is nice to know that I have that pre-cut pattern now to use again.  Even if it did take an extra hour to trace and cut :-/

I made a few alterations to the instructions as it called for interfacing within the collar and under the shirt front.  I didn’t have any  so just went for a facing in the same material, which turned out to be just right and wasn’t too thick!  The body of the shirt came together perfectly and the facings were relatively easy to attach too.  The collar confused me loads and the instructions weren’t very clear; the pictures didn’t really help either.  I attached it and just hoped I had done it right!  It turned out fine but it seemed a very long winded way to attach a collar!  I also ended up catching a tiny bit of the facing in the collar seam….ggggrrrr!  Adam didn’t notice though!