
For a while now we have been making our plastic bags into little balls and putting them in the cupboard under the kitchen sink. Well, I didn’t actually realise how out of hand the collection was getting until they started spilling out of the cupboard…I’m sure we had over 100 bags under there! This spurred me on to make a bag to hold a few plastic bags AND to get rid of the others!
I had an idea of what I wanted to make in my mind but I couldn’t find any tutorials online to match so I decided to draft what I needed myself. The bag I had in mind was close to the ones from Jeni’s tutorial over on In Color Order. Only, I wanted an accent piece on the base as well as around the top. As I wanted a long narrow bag, I also needed to change the measurements.
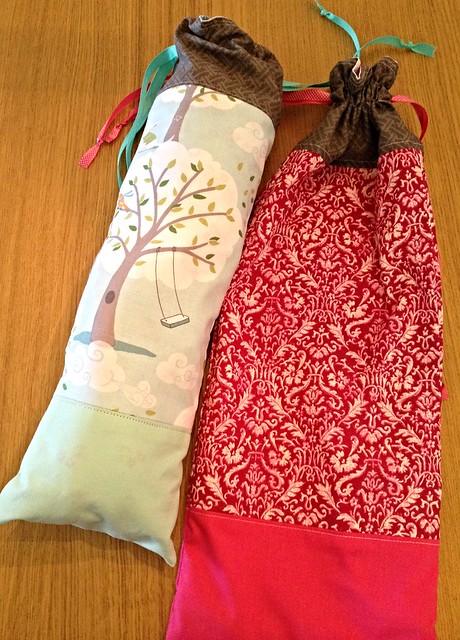
I made the bags in 2 different sizes as I wanted to try a couple of options. The cutting options are below:
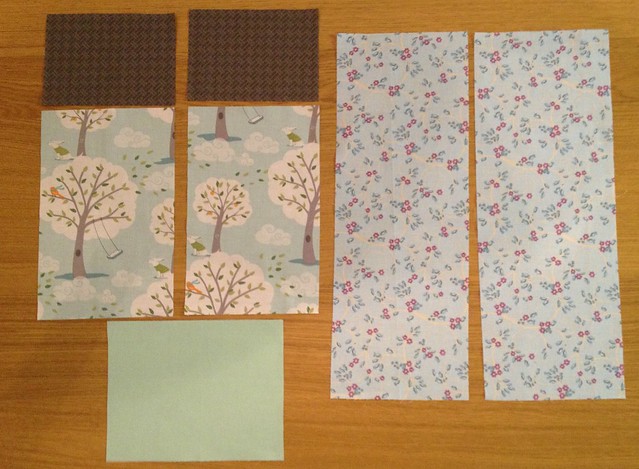
Cutting for the narrower bag (blue/grey one above):
Lining fabric
– Cut (2) 7″x19″ pieces
Base accent fabric
– Cut (1) 7″x9″ piece
Top accent fabric
– Cut (2) 7″x5″ pieces
Main body fabric
– Cut (2) 7″x11″ pieces
Lightweight interfacing for base fabric
– Cut (1) 7″x9″ piece
For the wider longer bag (pink above):
Lining fabric
– Cut (2) 7″x19″ pieces
Base accent fabric
– Cut (1) 7″x9″ piece
Top accent fabric
– Cut (2) 7″x5″ pieces
Main body fabric
– Cut (2) 7″x11″ pieces
Lightweight interfacing for base fabric
– Cut (1) 7″x9″ piece
1) Press all fabric pieces and iron the interfacing onto the reverse of the base accent piece.
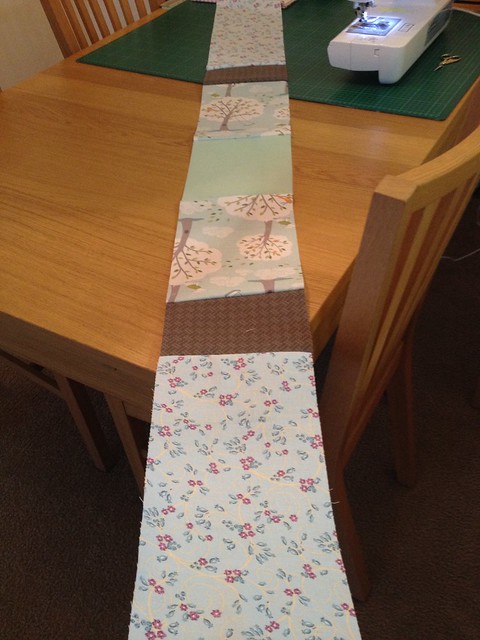
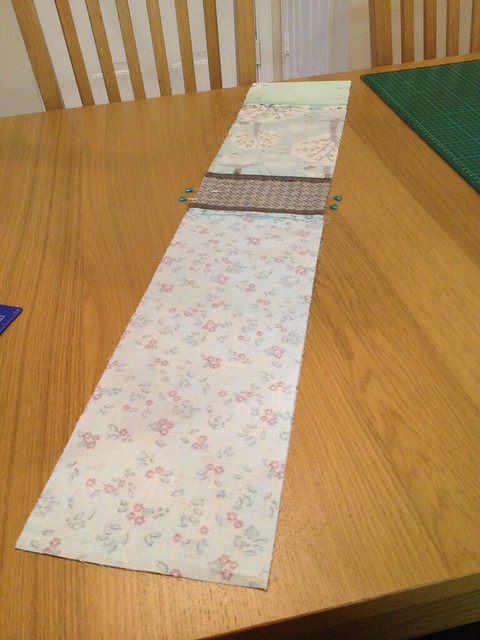
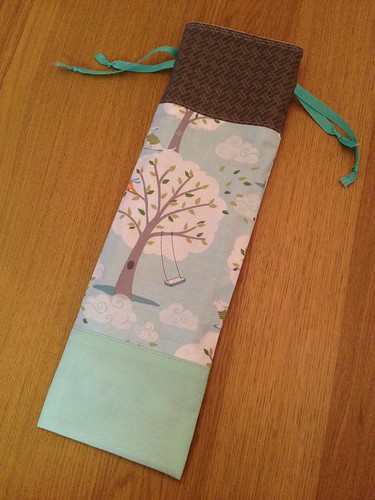
2) With a 1/2″ seam allowance, sew all fabric pieces together in the order on the picture below. The base accent piece needs to be in the centre. Then, working out on each side, you will need the main fabric, followed by the top accent piece and finally the lining/interior.
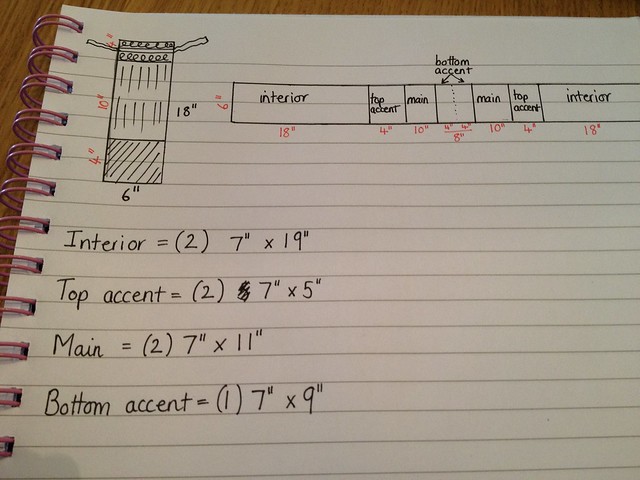
You will end up with all of your fabric in one long piece! Notice here that my directional main fabric is facing towards the centre. Press all seams open.
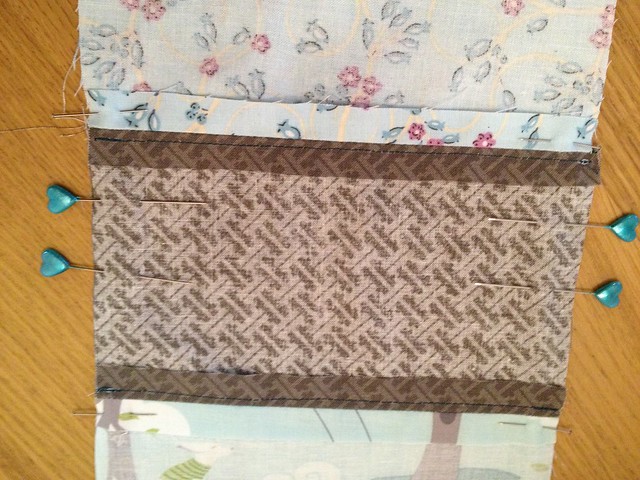
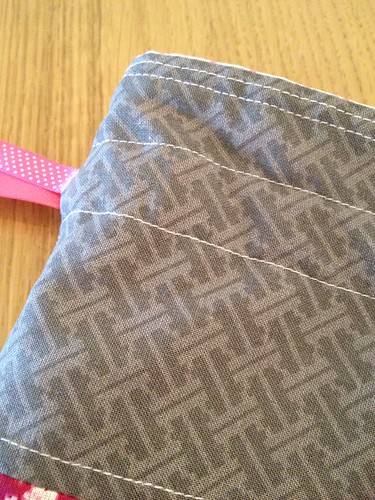
3. Now you will need to do any topstitching near the seams. I topstitched on both of the accent fabrics, just 1/4″ away from the seam.

4. Fold your long strip in half, right sides facing each other. Pin together around the 3 edges. Ensure that you leave a 1″ gap on the top accent piece – you will not need to sew this gap as this will be where your ribbon tie is inserted later. Now sew around the edges with a 1/2″ seam allowance, leave a gap large enough for your hand on the short edge. REMEMBER to leave the 1″gap on that top accent piece!
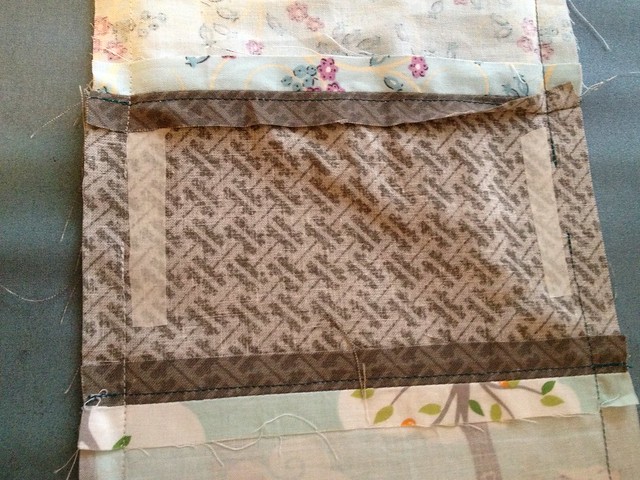
4. Using small strips of double sided interfacing, seal & press the seams on both sides back, where the 1″ gap was left. This helps to prevent the seam coming out of the hole when the drawstring is pulled.

5. Now it’s time for you to pull your sewn ‘tube’ the right way round. Use the gap you left on the short edge to put your hand in and pull the fabric back through. You will then need to press it so everything is looking nice and neat. 🙂
6. Where you left the gap for your hand, you will need to carefully fold the seam allowance in and stitch the hole up. You could hand stitch this but I prefer to do a line of machine stitching close to the edge – this is the lining so this visible stitching won’t be seen anyway!
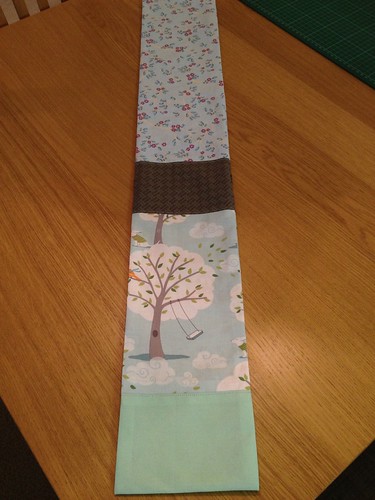
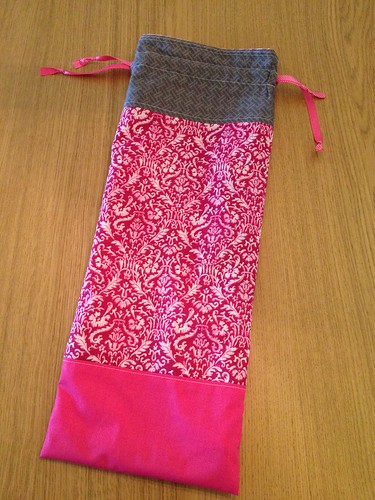
7. Tuck the lining in on itself to form the bag! You can now do an extra row of topstitching around the top edge of the bag to help the lining stay inside. You can see 2 lines of stitching on the photo below; one line is the topstitching that happened in step 3 and the other is the one we have done in this step.

8. It’s almost finished 😀 There are 2 types of finish for the ribbon closing.
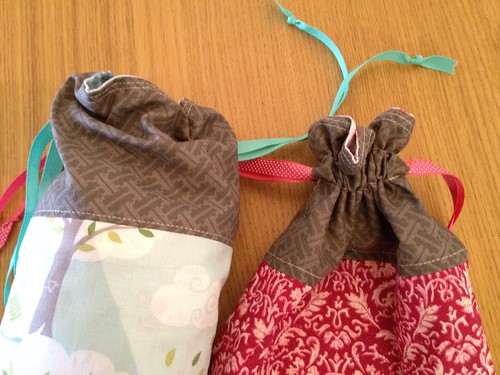
The blue/grey bag above has just had the ribbon threaded through & around the top of the bag, through the side seam gaps we made earlier.
The pink bag has had a channel sewn around the top for the ribbon to be threaded through.
AND that’s it! Stuff your bag full of plastic bags!
I think that these are so useful! I gave the pink one to a friend who put it to use immediately 🙂 I’m also thinking about making another one for a gift but popping a bottle of cocktail mix into it to double it up as a gift bag.
Let me know if you make one! I would love to see any pictures 🙂


I love this tutorial! Especially the use of the double sided interfacing on the draw string opening. Ingenious! This also reminds me that one of my daughters had requested I make her a similar bag to coral all her plastic bags. I guess I had better get busy. Thanks so much!
I’m glad to hear you like it! You will definitely have to share the one you make 🙂
Great tutorial, looks really useful…
Great tutorial and a perfect gift – especially as they’ve now started charging for plastic bags in the UK. An ideal stash buster as well as housewarming gift!
Very useful! Thanks.