
A little while ago I shared some of my plans for baby related sewing projects. I had planned on trying to get at least one of each made before Rosie arrived but that didn’t quite go to plan with me being put on bedrest. Even though I started with the simplest make in terms of skill, I couldn’t sit at the sewing machine for any longer than 20 minutes at a time so it took me quite a while to make 6 sets.
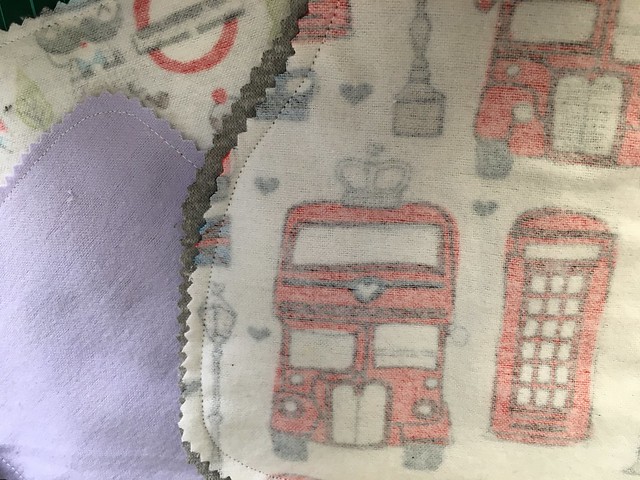
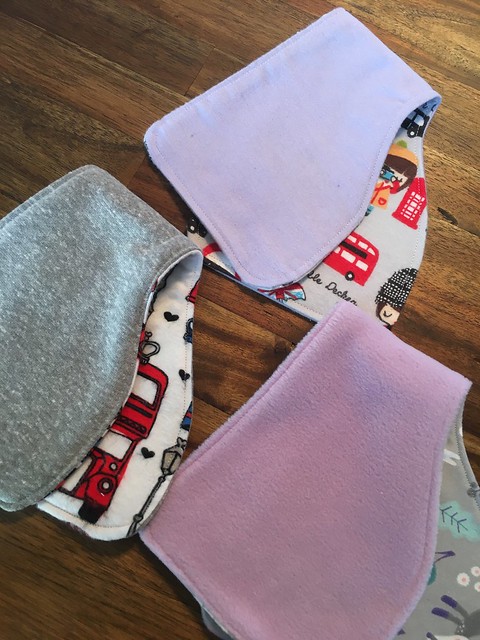
I wanted to experiment with different fabric weight combinations and had a bunch of suitable fabric to test out. I had simple cotton flannel, terry knit jersey & polar fleece.
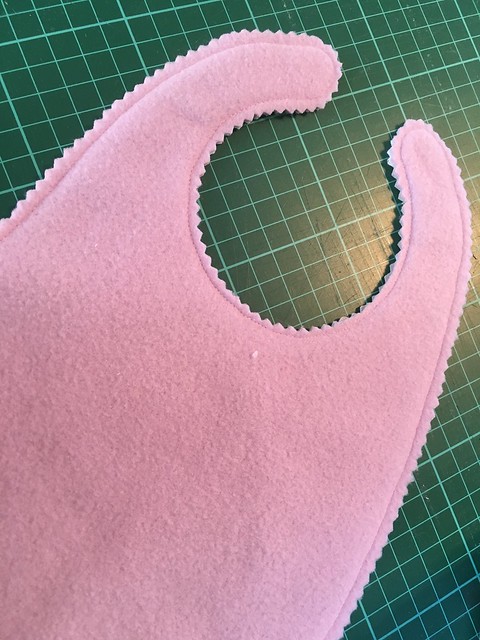
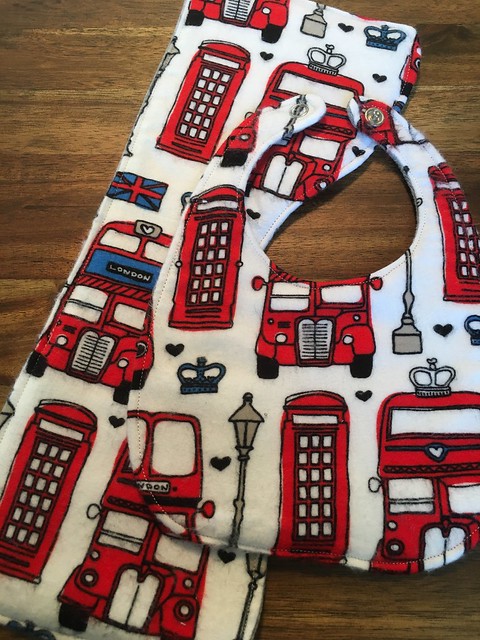
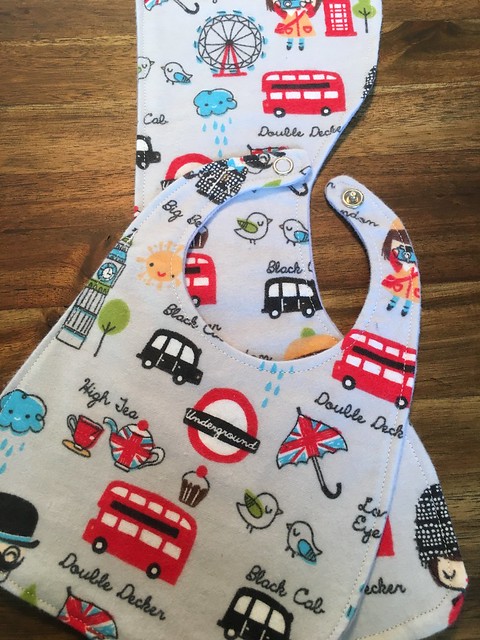
I used this pattern for the burp cloths and this one for the bibs. I had also read a few other tutorials to give me an idea of what fabrics would be the best for absorbency. I decided to pair 2 pieces of cotton flannel together and also flannel with a layer of quilting batting & jersey. I also combined the fleece with cotton flannel.
The construction was quite simple for both and I would definitely recommend both patterns if you are a sewing newbie. These were sewn right sides together, turned the right way round and then top stitched. Before turning, I used pinking shears to trim the seam allowance down. On the thickest set I trimmed the seam allowances differently on each fabric to reduce the bulk when they were turned the right way around.
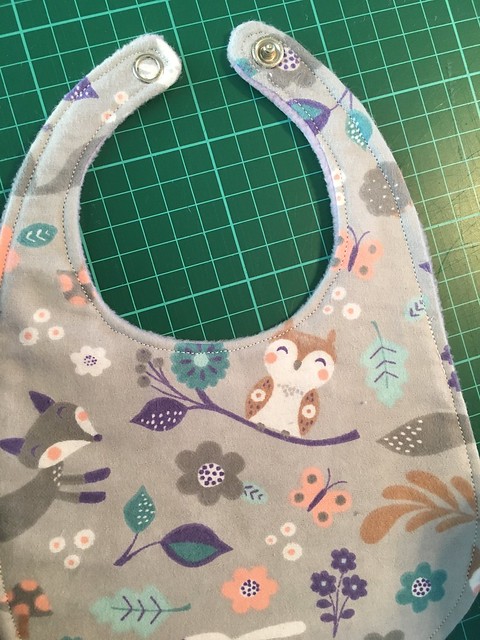
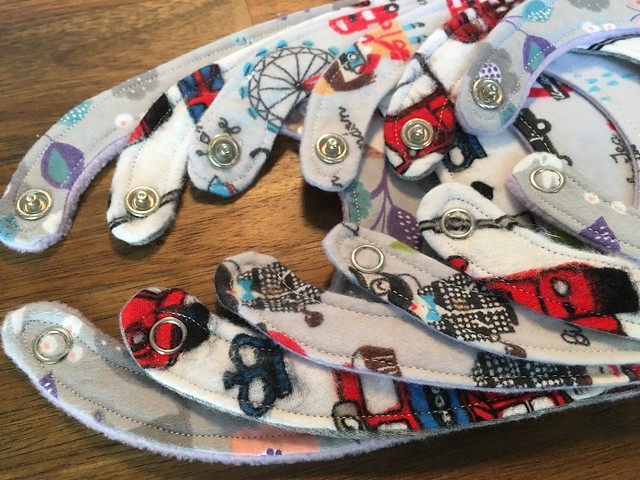
This was my first time using press studs so I did have to experiment with them. I actually ended up doing something different to what the tutorial suggested. For the first one I followed the instructions and applied the press stud before the front and back pieces were stitched together. However, this presented a problem when sewing as the metal was so close to the edge of the bib strap. This meant that it was quite hard to maneuver through the machine and my seams and topstitching had a few skipped stitches.
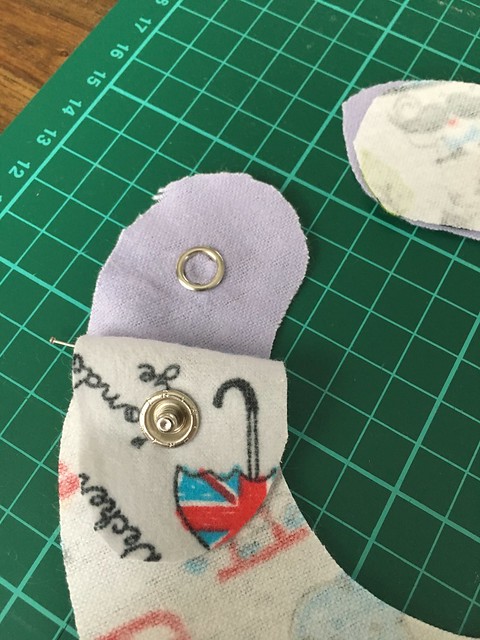
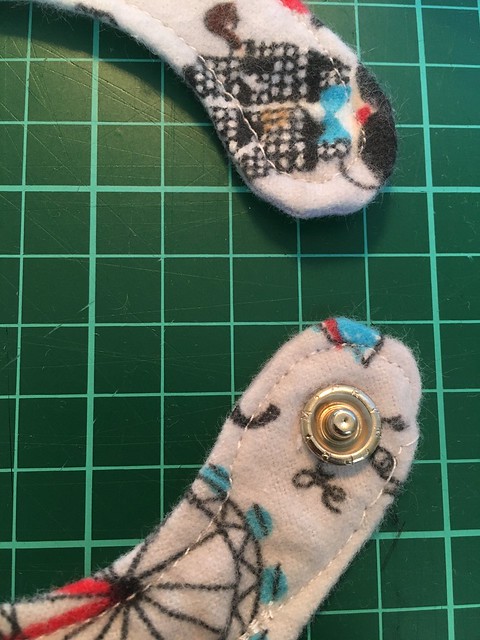
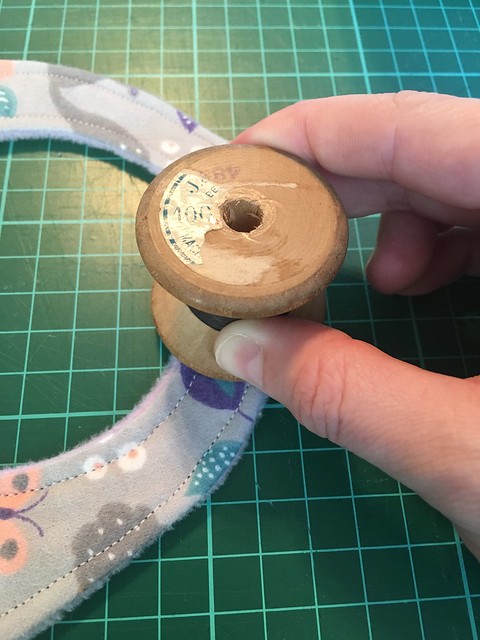
I wasn’t happy with the finish of that method so I decided to see if the press stud would go through all of the layers of fabric once the bib had been turned and topstitched. I got my hammer out and used a wooden bobbin so that I could give the press stud a good bash. It worked and it looked fine with the metal being visible on both sides of the fabric.
I ended up making 6 matching sets and gave 3 to a pregnant friend of mine, who also happened to be a Brit living in Alabama. Would I make these again? Yes but I would change a couple of things, especially now that I’ve had chance to use them. On the bibs, I would make the neck strap a little wider as they were quite difficult to turn the right way round. For the burp cloths I would make them a little wider and a little longer. I’ve not managed to burp Rosie successfully over my shoulder. I prefer to hold her cheeks with a cloth so for me they need to be wider than my hand. I do think that they make lovely gifts so I will definitely be making more!


Blimey you’ve been busy – talk about all or nothing! I’ve got my own method for press studs, too, as with many other things. You’re certainly not going to run out and you’ll be the coolest mum on the block with matching bibs and burp cloths:)
I know right! Due to them being quite a simple make it was easy to set up a bit of a production line with the construction! 🙂
I am making a set of burp cloths and a bib for pregnant friends of mine. My version uses organic cotton diapers as the base. Yours are too stinkin cute!
Thank you! Yes that’s a good idea too as they are super absorbent!
Yes, they do make an excellent gift! I love them & can’t wait for baby to arrive so I can try them out. You’re so creative xx